
The new user management feature allows you to effortlessly add, remove, or modify user access without needing assistance from PeopleInsight analysts.
Accessing User Management
- Log in to PeopleInsight.
- Navigate to the User Management option under Management in the top-right corner.

Once you click on that, you will see the following options:

Account Types:
Account types define the level of access for each user. The names are customizable. As a default, they are formatted as:
Company Name – Admin – (1, 2, 3, etc.)
Examples:
- Admin1: Access to "HR Summary" and "HRBP" tiles.
- Admin2: Access to "HRBP" tile only.
In order to see what workbooks an admin account has access to, select the account type and click on "See Views"
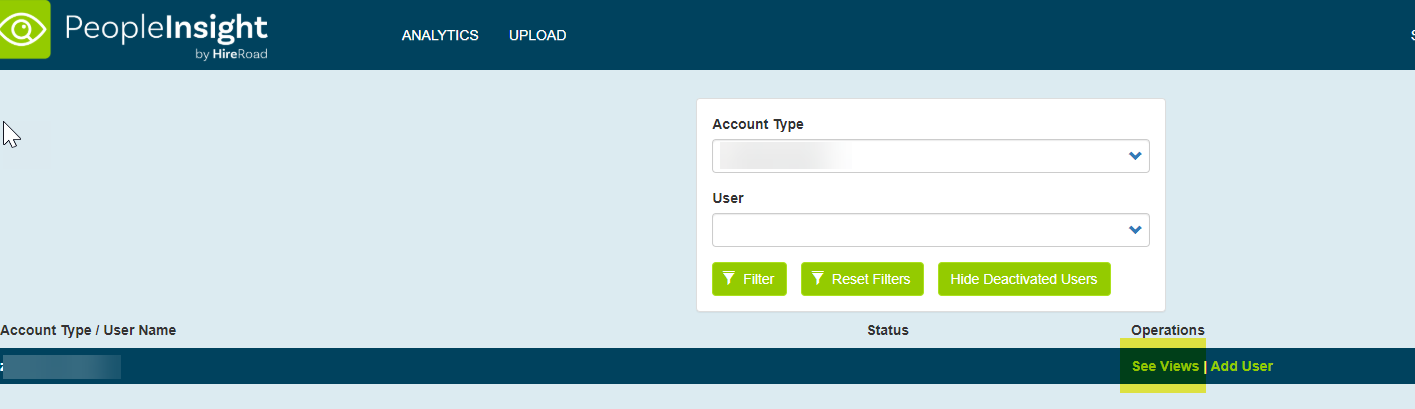
Users:
Users contain the list of people who have access to PeopleInsight.
Adding a New User

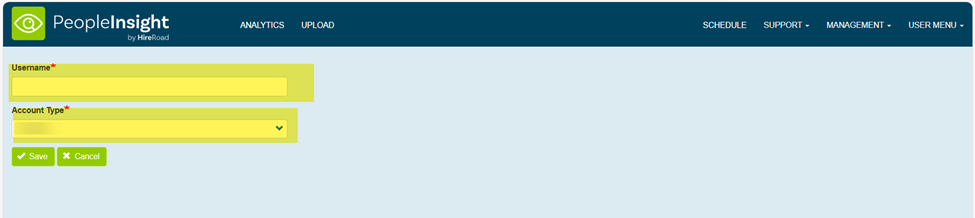
- Click Add User.
- Fill in the details:
- Username: Enter the user’s email address.
- Account Type: Select the appropriate admin account.
- Click Save.
- In the user list, find the newly added user and click Activate User.
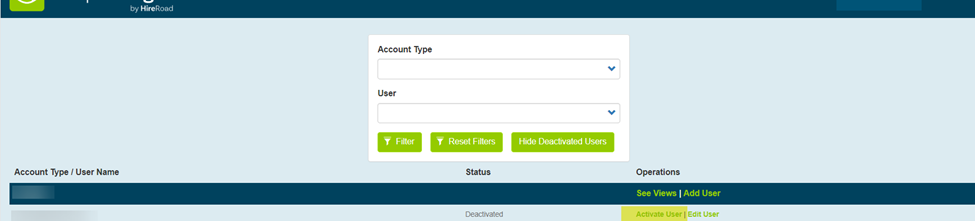
The user will be added.
Removing a User
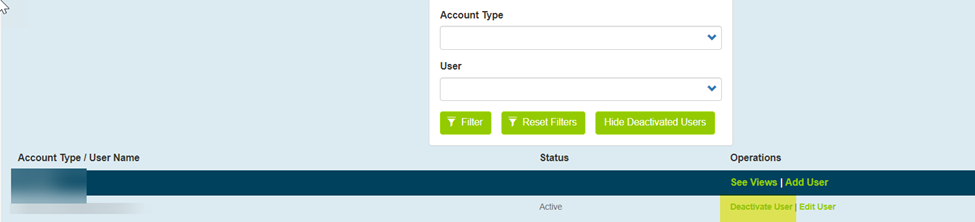
- In the user list, locate the user.
- Click Deactivate User.
The user’s access will be revoked.
Changing a User’s Account Type
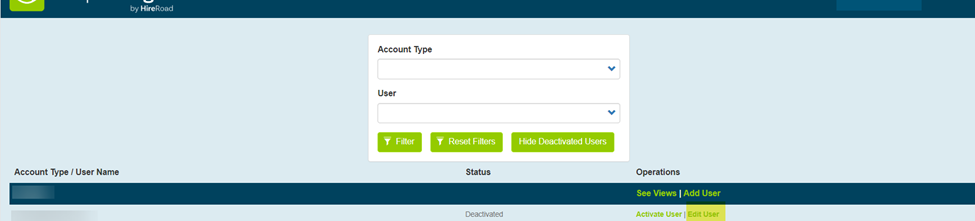
- Locate the user in the user list and click Edit User.
2. Select the new account type.
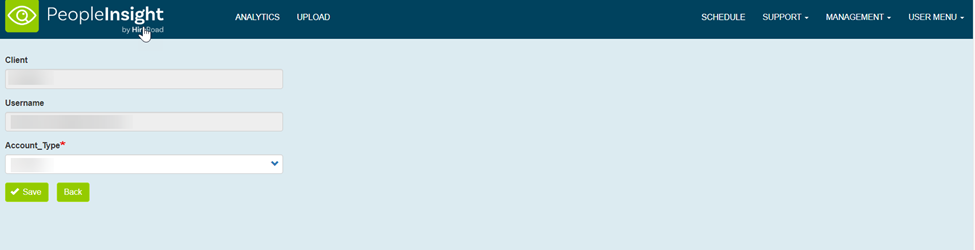
3. Click Save.
*To change what workbooks an admin account has access to or to create new admin accounts, please contact your PeopleInsight analysts.