
This article provides an overview and instructions on group management and how to assign the following parameters to a group: courses, roles/permissions, discussion boards, documentation, etc. To create a new group, click the green plus sign button on the top right corner of the Groups box in the Users & Groups menu or click the “New Group” button on the Groups screen.
Name – Visible in the “Communities” section of the Catalog (if “Self Join” is checked); not visible in the user’s profile if “Publicize Membership” is not checked (must be checked if “Self Join” is checked as well).
Avatar – Visible in the “Communities” section of the Catalog (if “Self Join” is checked).
Self Join – Allows or prevents users to join themselves to the group from the “Communities” section of the Catalog (forces “Publicize Membership” to be checked). If this option is disabled, the group will not show up in the “Communities” section of the Catalog.
Publicize Membership – Shows or hides membership to group in user profiles.
Discussion – Enables or disables a discussion board for the group. If discussion moderation is enabled, when posts are made to the discussion board by group members, they must be approved before they can be displayed.
Short Description – Plain text only box for a brief description of the group.
Note: This field has a 512-character limit. If you need graphics or need to go into more detail about the group, use the Description WYSIWYG box.
Search Tags – Any words you would like associated with the group for users to be able to search for it in the search bar on the Groups page.
Note: Any part of the Short Description can also be used when searching for a group.
Modify Group

For each group listed in “Groups”, there are buttons you can click to modify the group:
-  Group Properties
-  Auto-Join Rules
-  Enrollments
-  Documents
To view more information and modification options for an existing group, click on the name of the group in the list.
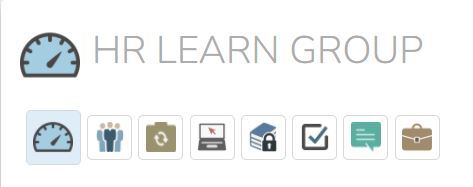
 Dashboard – View a summary of the group’s information and enrollments. You can also add documents or create auto-join rules for the group from the shortcuts listed under “Actions”.
 Group Properties – All properties from the New Group page, with a Group Members tab, where you can manage the list of members in the group.
 Auto-Join Rules – Click “New Ruleset” to set rules that automatically put new users into the group based on the criteria in the ruleset. To update the properties of an existing ruleset, click on the name of the ruleset in the list.
 Enrollments – Manage any enrollments assigned to the group. Do not create group enrollments here. Instead, create an enrollment from the Course Modification page, and on the enrollment’s page, in the Rulesets tab, create a ruleset that auto-enrolls members of the group. To update the properties of an existing enrollment, click on the name of the enrollment in the list.
 Private Catalog Access – Give groups access to private catalogs.
 Roles – All members of a group can be assigned a role(s).
 Discussion – Group’s Message Feed and list of Moderators. If “Discussion Moderation” is enabled in Group Properties, posts must be approved by either the Administrator (non-user), a user in a role with the Group Manager permission for that group, or one of the group’s Moderators. Posts not yet approved or denied appear in the Message Feed tab of the Discussion section of the group’s Modify page.
 Documents – Upload documents accessible only to group members and organize them within document folders. To update the properties of an existing document, click on the name of the document in the list.